Getting An Accurate Distance Count
July 25, 2021
Getting An Accurate Distance Count
This article applies to both the standard size Type-CP Reel and the smaller Mini-size Type-MX Reel. Before we start, we remind you that the distance counter is for reference only. Therefore, you must verify the actual position and depth with a Sonde Locator or Pipe & Cable Locator before excavating.
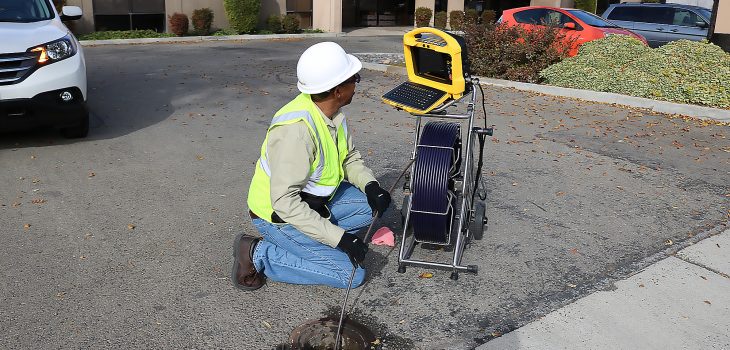
When arriving at a job site, I notice that the user sets the reel in place, plugs in, mounts the control module, then turns it on. Working in this order will not harm the control module but it may not get the best results from the distance counter. The reel will be calibrated to true zero by following these instructions when the control module is turned on.
Reel Type Setup – Selecting a reel type applies to the vCam-6 and the older vCam-5 control module. The vCamMX-2 control module uses only one reel type so this is automatically set in its operating system.
This setting is done only when changing the type of reel being used. If you own only one reel, you need to do this setup only one time. However, if you switch between different reel types you will have to do this each time you switch reels. Selecting the reel type tells the control module what the reel diameter is and each time the reel spins it will calculate an amount of pushrod being deployed or retrieved.
1. Press the F10 Menu twice to bring up the Setup menu.
2. Use the Down ![]() arrow key to scroll to the Reel Settings selection.
arrow key to scroll to the Reel Settings selection.
3. Press Enter or use the Right ![]() arrow key to enter the reel choices sub-menu.
arrow key to enter the reel choices sub-menu.
4. Use the Up ![]() and Down
and Down ![]() arrow keys to highlight the reel model type. Note that the Type-M and Type-CP reels offer a choice of pushrod length by pressing Enter again or using the Right
arrow keys to highlight the reel model type. Note that the Type-M and Type-CP reels offer a choice of pushrod length by pressing Enter again or using the Right ![]() arrow key.
arrow key.
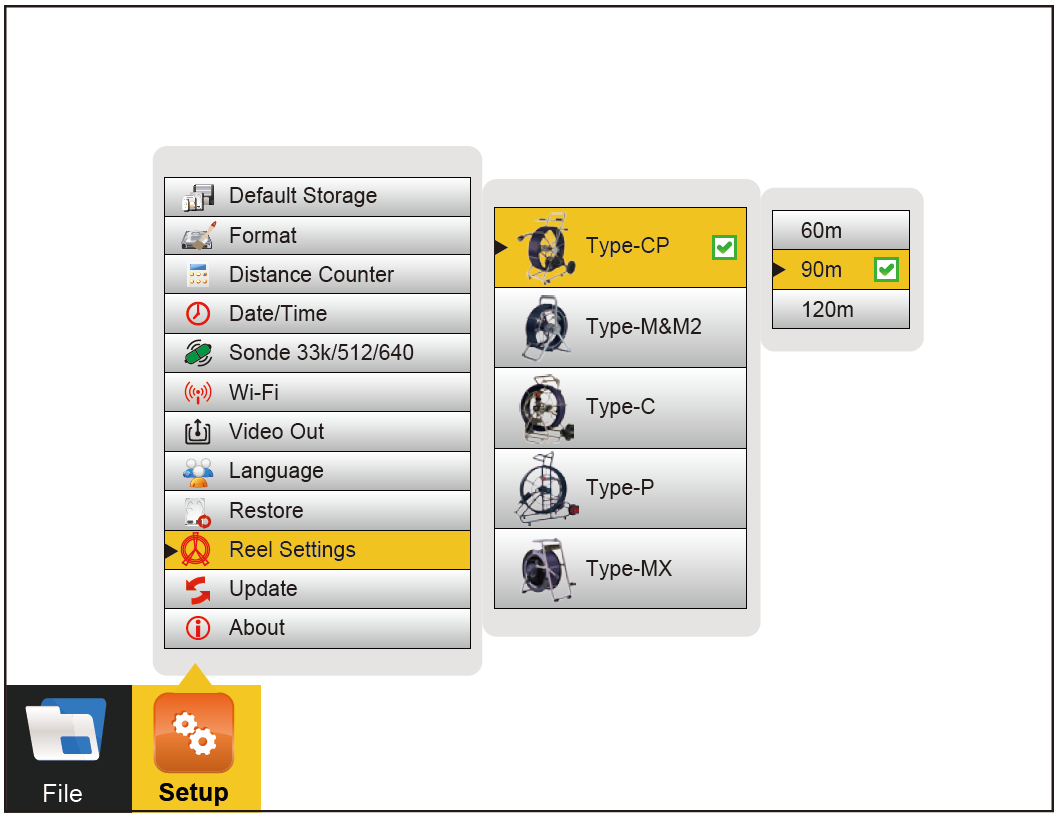
5. Highlight the reel choice and sub-menu length choice if applicable.
6. Press the Enter key to save the changes.
7. Press the ESC key to return to the main Setup menu, press ESC twice to return to the main screen.
Setup the Distance Counter at the Start of the Job
For best results from the distance counter, follow these instructions starting with the control module turned off.
1. Turn the cage to approximately the 9 o’clock position using the sonde cup as the guide.

Sonde cup at 9 o’clock position
2. Hold the cage at the 9 o’clock position, grab the spring assembly, and thread the pushrod through the cable guide.
3. Position the base of the sonde cup into the cable guide and lock the cage, as shown below. The sonde cup (a) is now in the cable guide at a 12 o’clock position, and the pushrod section from the cage to the sonde cup (b) is bent from the cage to the cable guide.
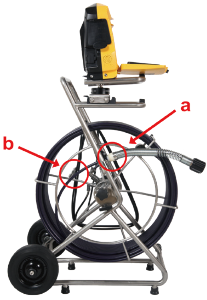
The sonde cup (a) in the cable guide at the 12 o’clock position
4. Attach the interconnect cable to the control module.
5. Power on the control module.
When the control module starts it will see the position of the sonde cup as zero.